Online Technical Training Blog
How to Use Microsoft Edge Browser For Taking Online Exams
We know getting ready for your online exams can be stressful and even confusing, particularly if you don’t know where to start or where to write your exam. But don’t worry, It’s pretty simple. Here’s a step by step guide to help you access and complete your exam.
Before you begin make sure you have your login and password ready. This has previously been sent to you in your Registration Confirmation email notification. If you did not receive this email, please contact us at 1-866-279-1457 and we will resend it.
Let’s get started with the step-by-step guide below:
Step One. Browser
You must use Microsoft Edge with IE mode activated for our exam system. Unfortunately, you cannot use any other browsers such as Google Chrome, Firefox or even Microsoft Edge for online exams. The reason is our online exams require ActiveX control to load them and only Internet Explorer supports ActiveX.
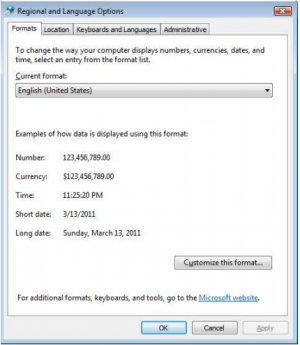
Step Two. Regional Settings
In order to access the Resource Center and all its associated materials, including the online exams for your program, you will need to ensure that your computer's regional settings are set to US English. If your computer’s language is not set to English, please, go to "Control Panel" and click on the "Regional Settings" item. Select English (United States) from the dropdown box. Click on “Apply” to save changes.
Step Three. Browser Setting
As Internet Explorer is retired you must use IE mode in Microsoft Edge with our exam system. You cannot use any other browsers such as Google Chrome or Firefox for online exams. Follow the steps below to activate Internet Explorer mode on Microsoft Edge
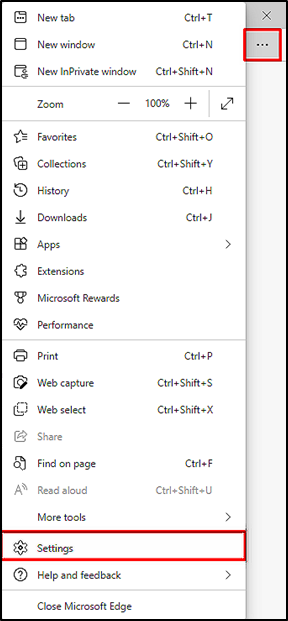
1. Changing Microsoft Edge Browser Settings
Open Microsoft Edge and click on the Settings and More menu button on the top right corner of the Edge browser and select Settings from the drop-down menu.
2. Changing the Default Browser Option
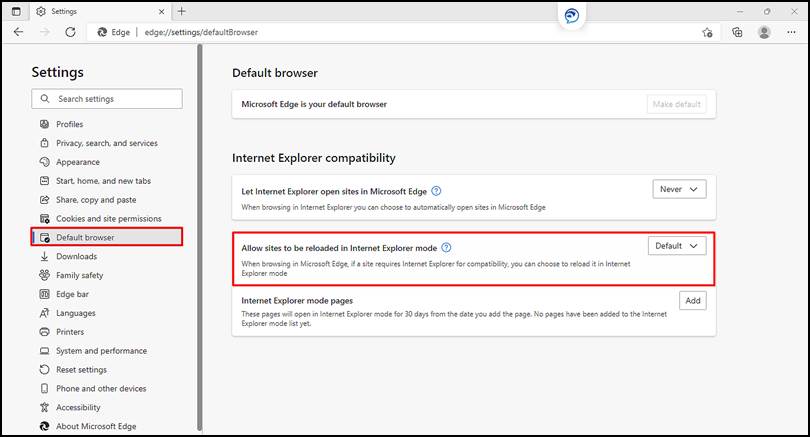
Next, click Default Browser from the settings options on the left, and under the “Internet Explorer compatibility” section, select Allow from the “Allow sites to be reloaded in Internet Explorer mode” drop-down menu options. If this option is already set to allow, proceed to the program website (step 4).
3. You Would Now Be Prompted to Restart the Browser for the Setting Changes to Take Effect, So Click Restart.

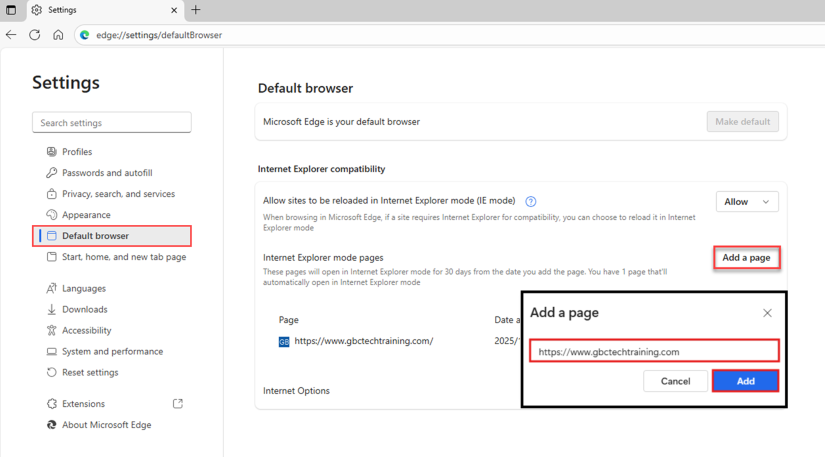
4. Accessing the Website - From the same screen proceed to add the school’s website as a page to be reloaded in IE Mode.
Click “Add a page” then enter the respective website with the format https:// preceding the website. For George Brown College Students enter https://www.gbctechtraining.com (please note that the URL must include www). For all other partner colleges or universities enter your respective site, for example, University of Houston students enter https://uhd-gbc.com (please note that the URL should not include www), MiraCosta College students enter https://miracosta-gbc.com, etc. Then click the “Add” button as shown below.
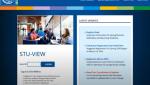
Step 4. Accessing the Website and Logging into the Student Resource Centre
Now proceed to the website and the page will be in Internet Explorer Mode (IE Mode). Log in to the Resource Center at www.gbctechtraining.com using the login and password you were sent in your Registration Confirmation email.
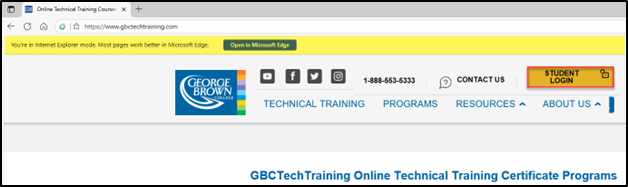
You can proceed to take your exam.
Step 5. Test Your Connection to the Marker Server
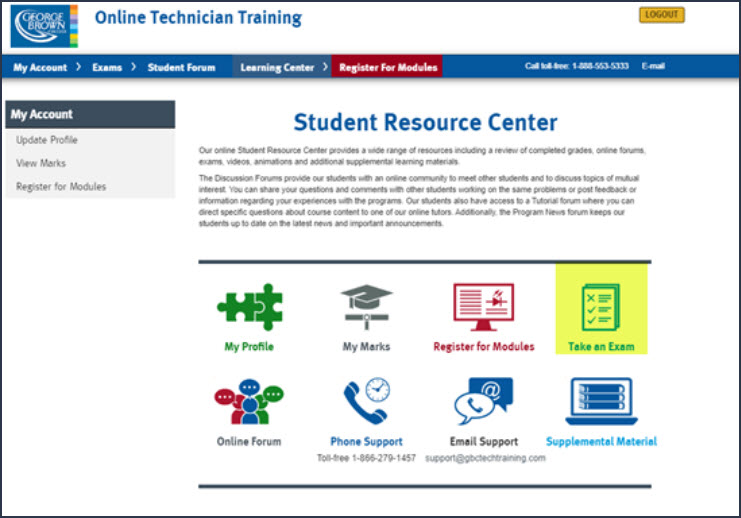
From the home page of the “Student Resource Centre”, select the “Take an Exam” link and select the module exam that you wish to take.
At this point you should see a popup at the bottom of your Internet Explorer window saying “This website needs to install an add-on for the selected exam module”. Please click on “Install” and then “Yes” and then “Allow” when prompted.

Once you have selected an exam module and installed the Active X Controls applet, the following dialog box will appear.
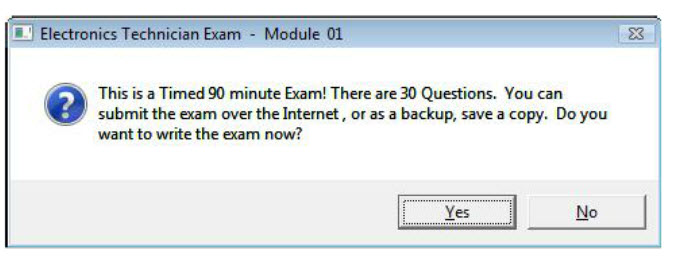
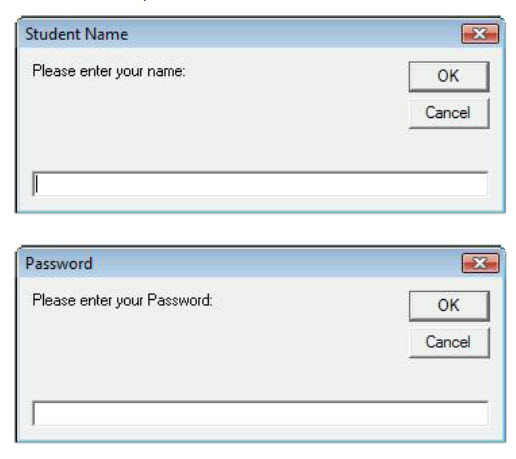
Click on the “Yes” button to continue. Do not worry, you are not actually going to take the exam yet. These steps are required to confirm your ability to submit the exam over the internet. You will now be prompted to enter your student name and password.
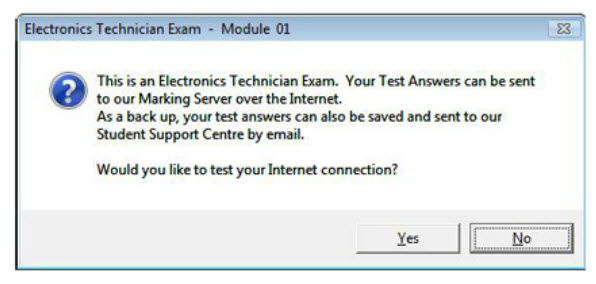
Next, you will be asked if you wish to test your internet connection to the marking server. Select “Yes”. You will receive confirmation if a successful connection has been established with the Marking Server.

Click the “OK” button and you will be returned to the “Final Exams” module selection page.
Please now check your email account. It may take up to 20 minutes for the response email message to arrive. Once you receive this email you will know that you are able to connect to the Marking Server.
If a successful connection has NOT been established you will receive an error message as below.

If you do not receive an email message please contact our Student Support Centre at 1-866-279-1457 for assistance.
Step 6. Let’s Take the Exam
Return to the Resource Center to select the “Final Exams” link and click on the “Select Module” link to choose the desired final exam. This time you will not be prompted to install the add-on again assuming it was installed when you did the connection test for this module. You are required to install the add-on only once for each module. You will now be presented provided with the following sequence of steps.
Click the “Yes” button then re-enter your student name/login and password.

You will then be prompted to do an internet connection test again. Click on the "No" as you have already tested your ability to submit the exam to the Marking Server. Please be sure that you are ready for the exam before clicking on “No” as this is the last step before the exam. Clicking on “No” will launch the exam right away and you will be given 90 minutes to answer 30 questions.
Use the Back and Next buttons to move back and forth through the exam questions. You may leave a question unanswered and return to it later.
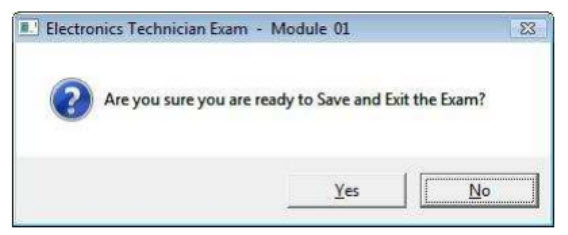
Once you have completed all questions in the exam, click the Exit button. You will be asked “Are you sure you are ready to Save and Exit the Exam?” Click Yes.
Your exam can now be submitted for grading. Click Yes to submit.
You will then receive confirmation that the exam has been sent. Your exam results will be emailed to your email account.
If your submission attempt was unsuccessful, you will receive a notification saying that the Exam program was unable to send the exam to the Marking Server. Do not worry if a problem arises; you will have the option to retry sending the exam if necessary. If you are using a proxy server, you will have the option to enter the proxy server name which may resolve the problem or as a last resort, you will also have the option to save the exam file to your computer. This will allow you to email the exam to the Student Support Center later.
If you choose to Save File, you will be prompted for a location to save the exam in your computer. You will then receive confirmation once the exam has been saved on your computer. You can then send the saved exam file by email to [email protected] for grading.
Once the exam has been evaluated, your report card will be emailed back to you within an hour of taking the exam and your mark will be posted in the “My Account” page of the Student Resource Center the following day.
If you failed your module exam, you will immediately receive an email from the Marking Server asking you to contact the Student Support Center for further assistance.
So that`s it. Good luck with your exams!
If you have any other questions about the online exam process, please call us toll-free at 1-866-279-1457 (within the US and Canada) or contact us by email at [email protected] we would be happy to assist you.